

Deploy on Nutanix
This guide will help you deploy TrapEye decoys on your Nutanix environment smoothly, from importing the disk image to launching your first virtual machine.
Import the TrapEye Nutanix Image
Section titled “Import the TrapEye Nutanix Image”In Nutanix Prism Central, go to Compute → Images and click the Add Image button.

In the Anantis TrapEye Portal, go to TrapEye Decoys → Installation, select the Nutanix Installation Card, and click the link icon to copy the download URL.
Back in Nutanix, paste the URL in the Image URL field and leave the authentication fields empty. In the Source section, ensure the file extension ends with
.qcow2, the type is set to Disk, and paste the SHA256 checksum from the TrapEye Nutanix Installation Card.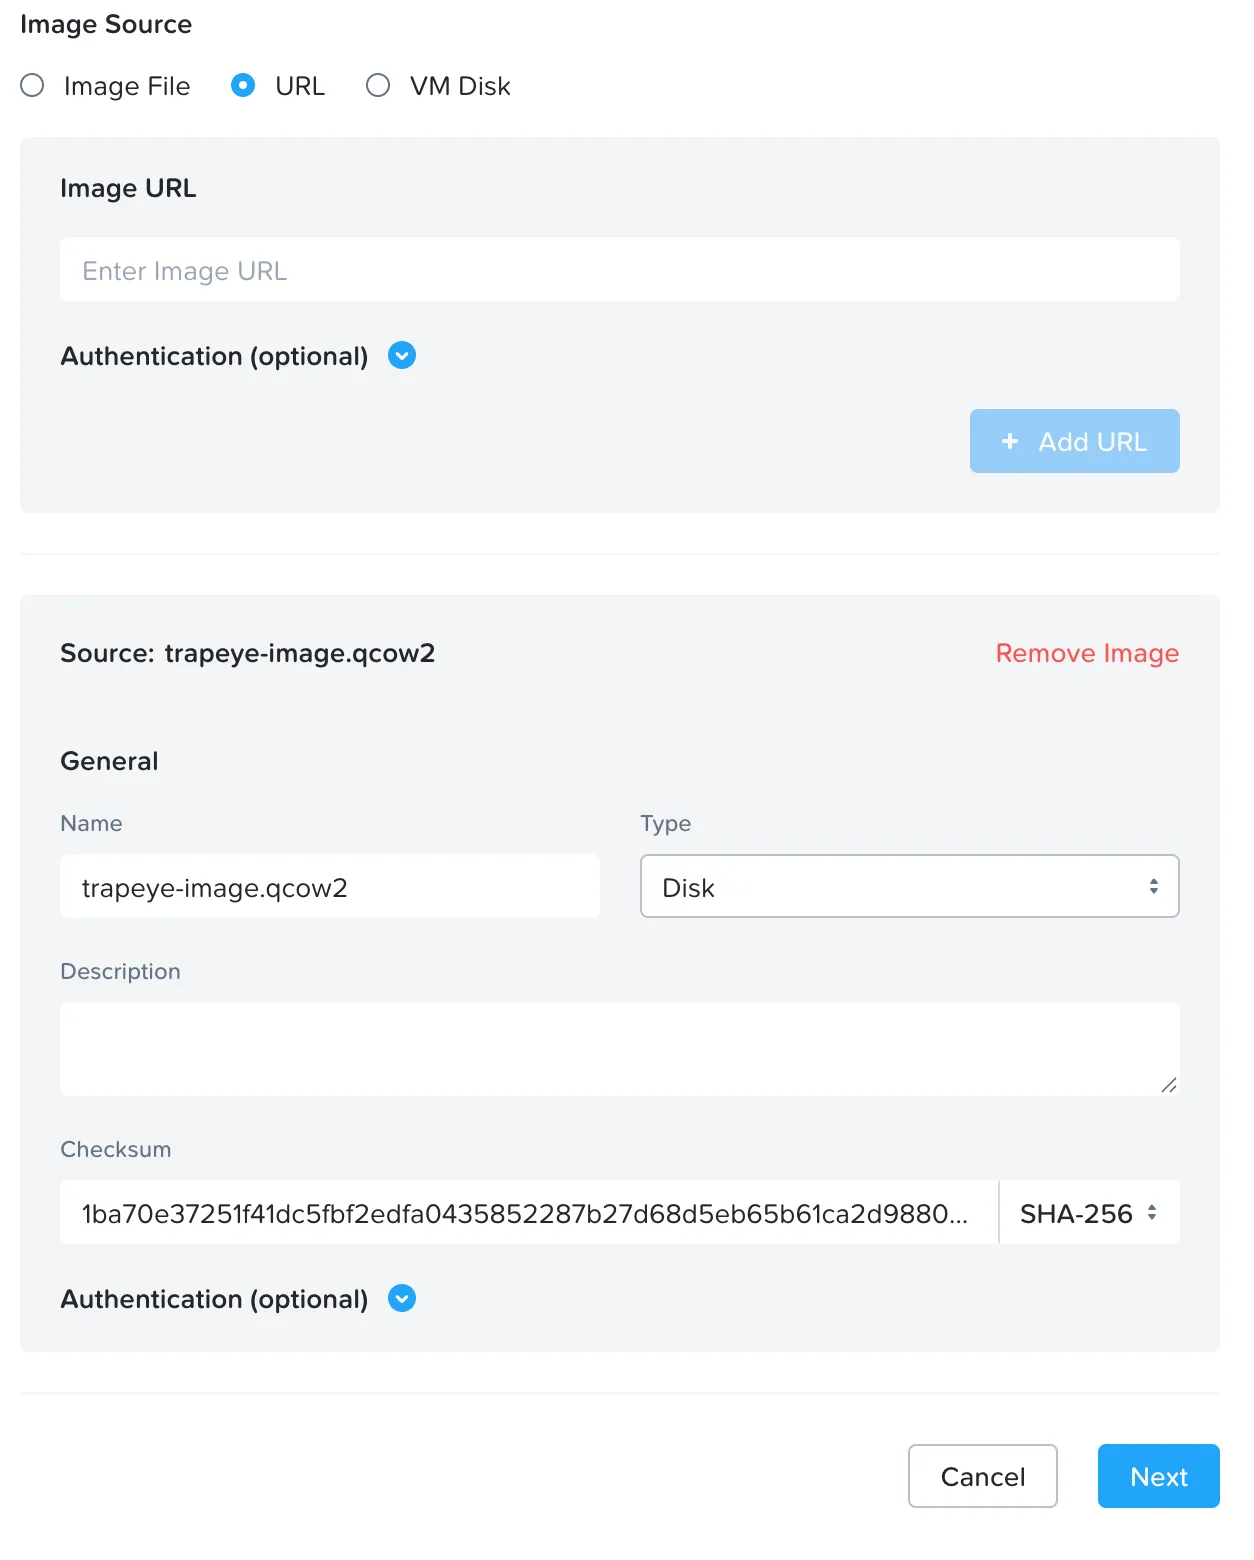
Select the target cluster and click Save to create the image.
Create a New Virtual Machine
Section titled “Create a New Virtual Machine”In Nutanix Prism Central, go to Compute → VMs and click the Create VM button.
Fill in the general details: set a name and select the target cluster.
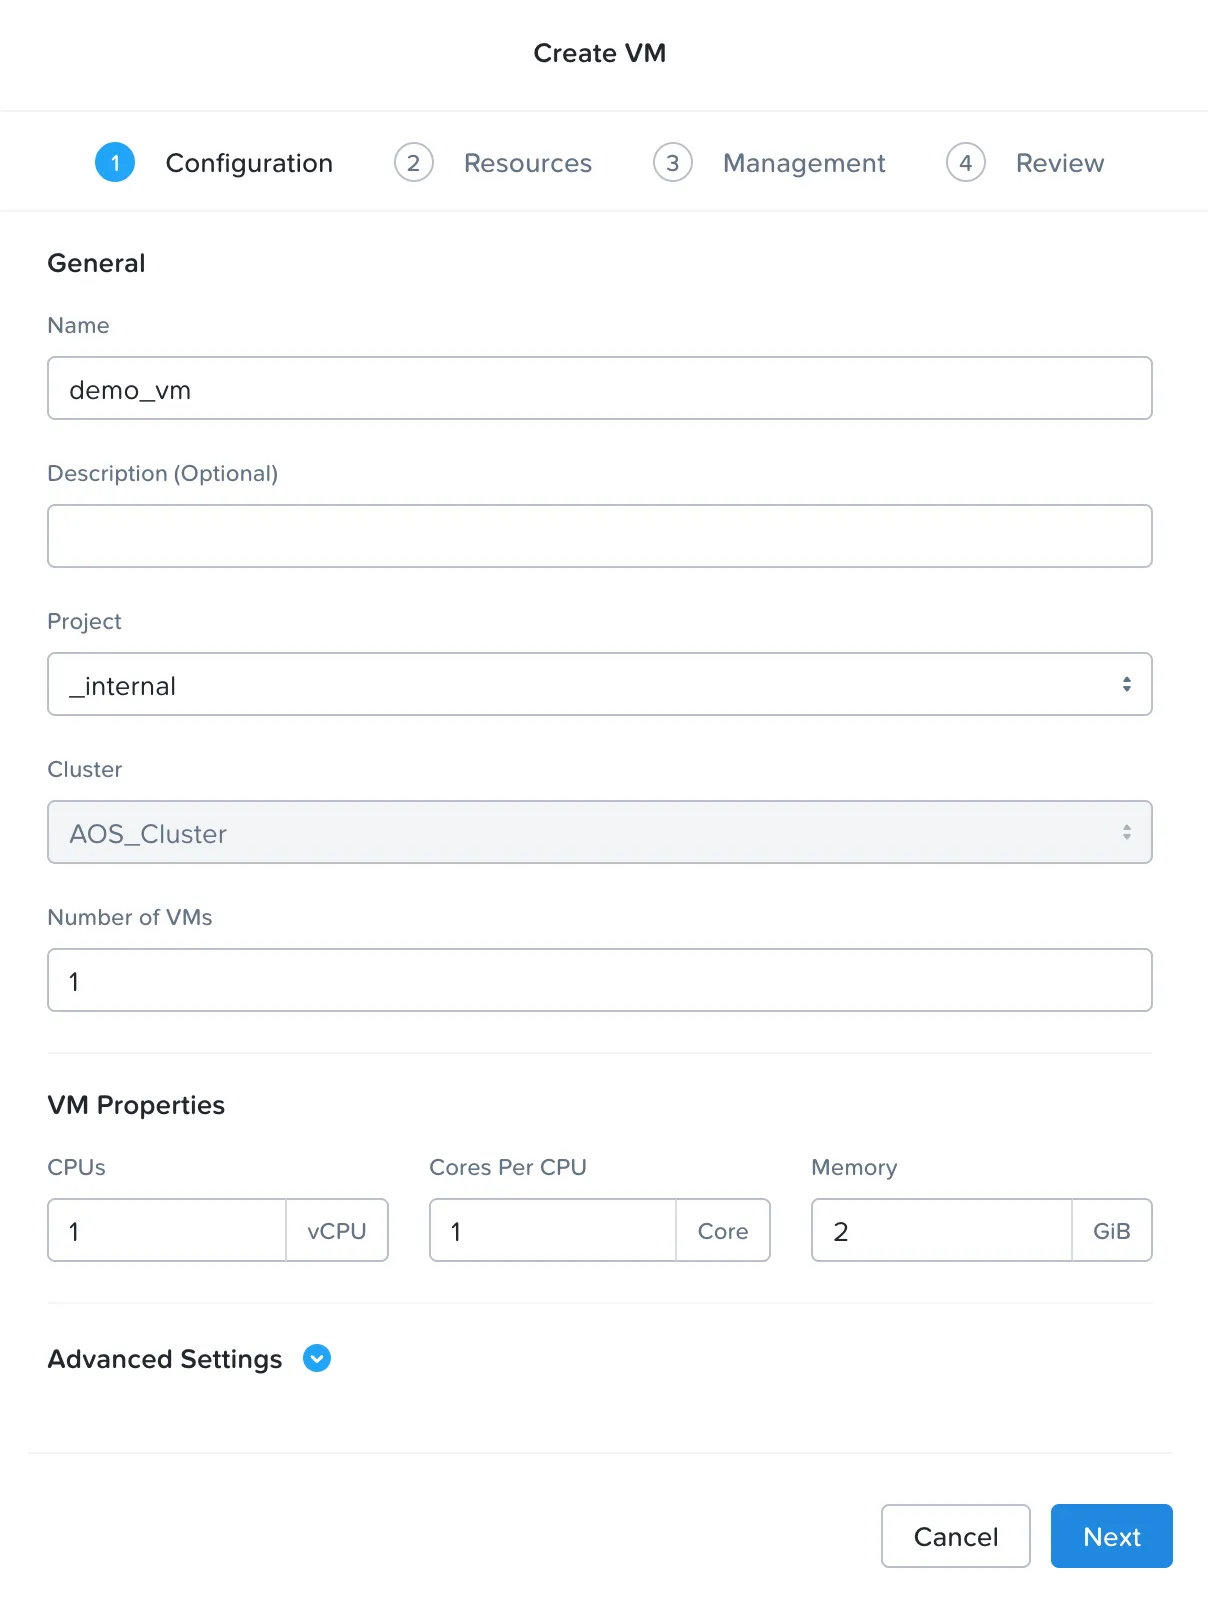
In the Resources section, assign CPU and memory according to the recommended values:
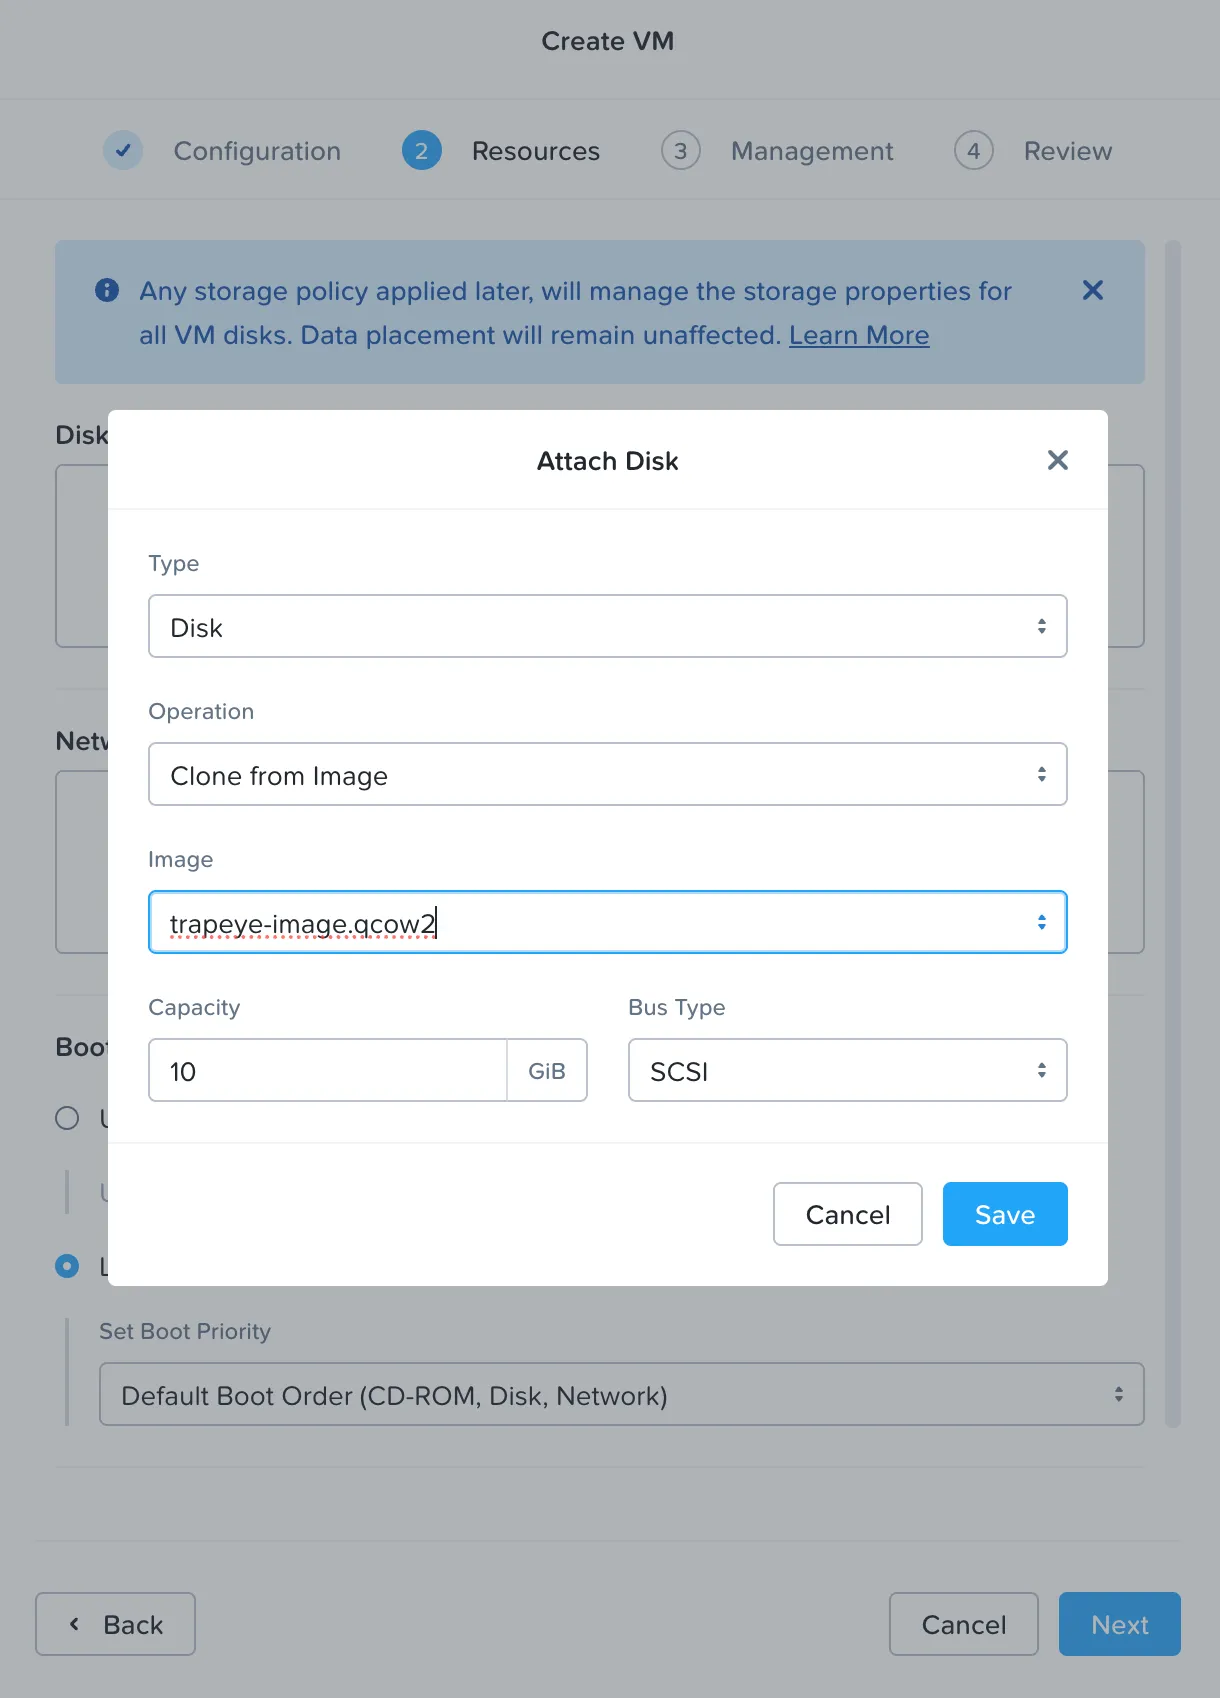
Resource Minimum Value Recommended Value CPU 1 vCPUs 1 vCPUs Memory 1024 MiB (1 GB) 2048 MiB (2 GB) Still in the Resources section, attach a disk by clicking Attach Disk. In the Operation dropdown, select Clone from Image, select the TrapEye image imported earlier, and leave the default Capacity and SCSI bus type values.
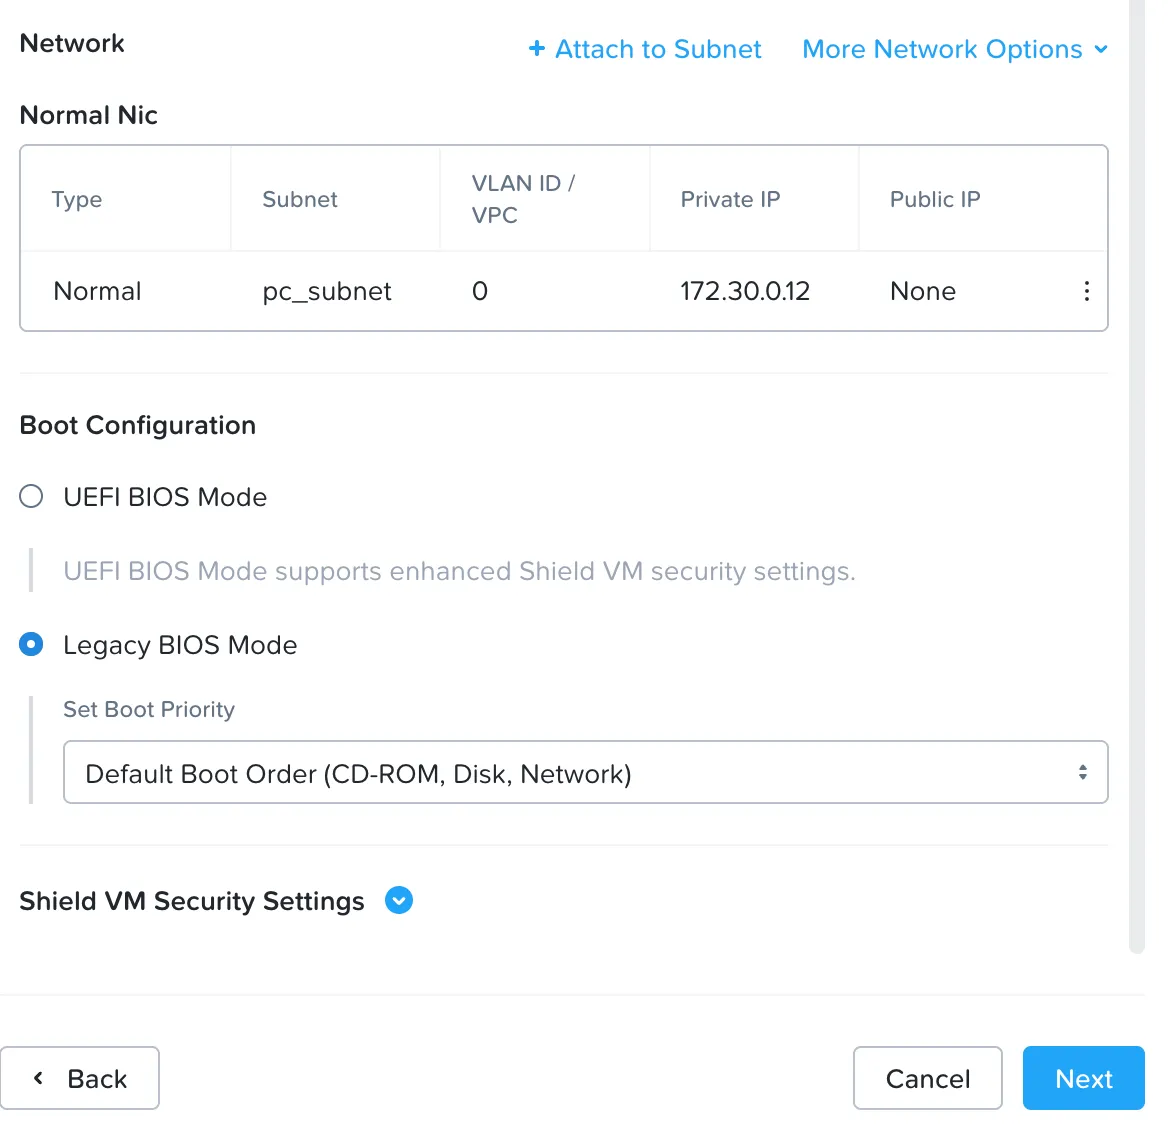
In the Network section, attach the subnet you want to protect and set the IP assignment to DHCP.
In Boot Configuration, select Legacy BIOS Mode.
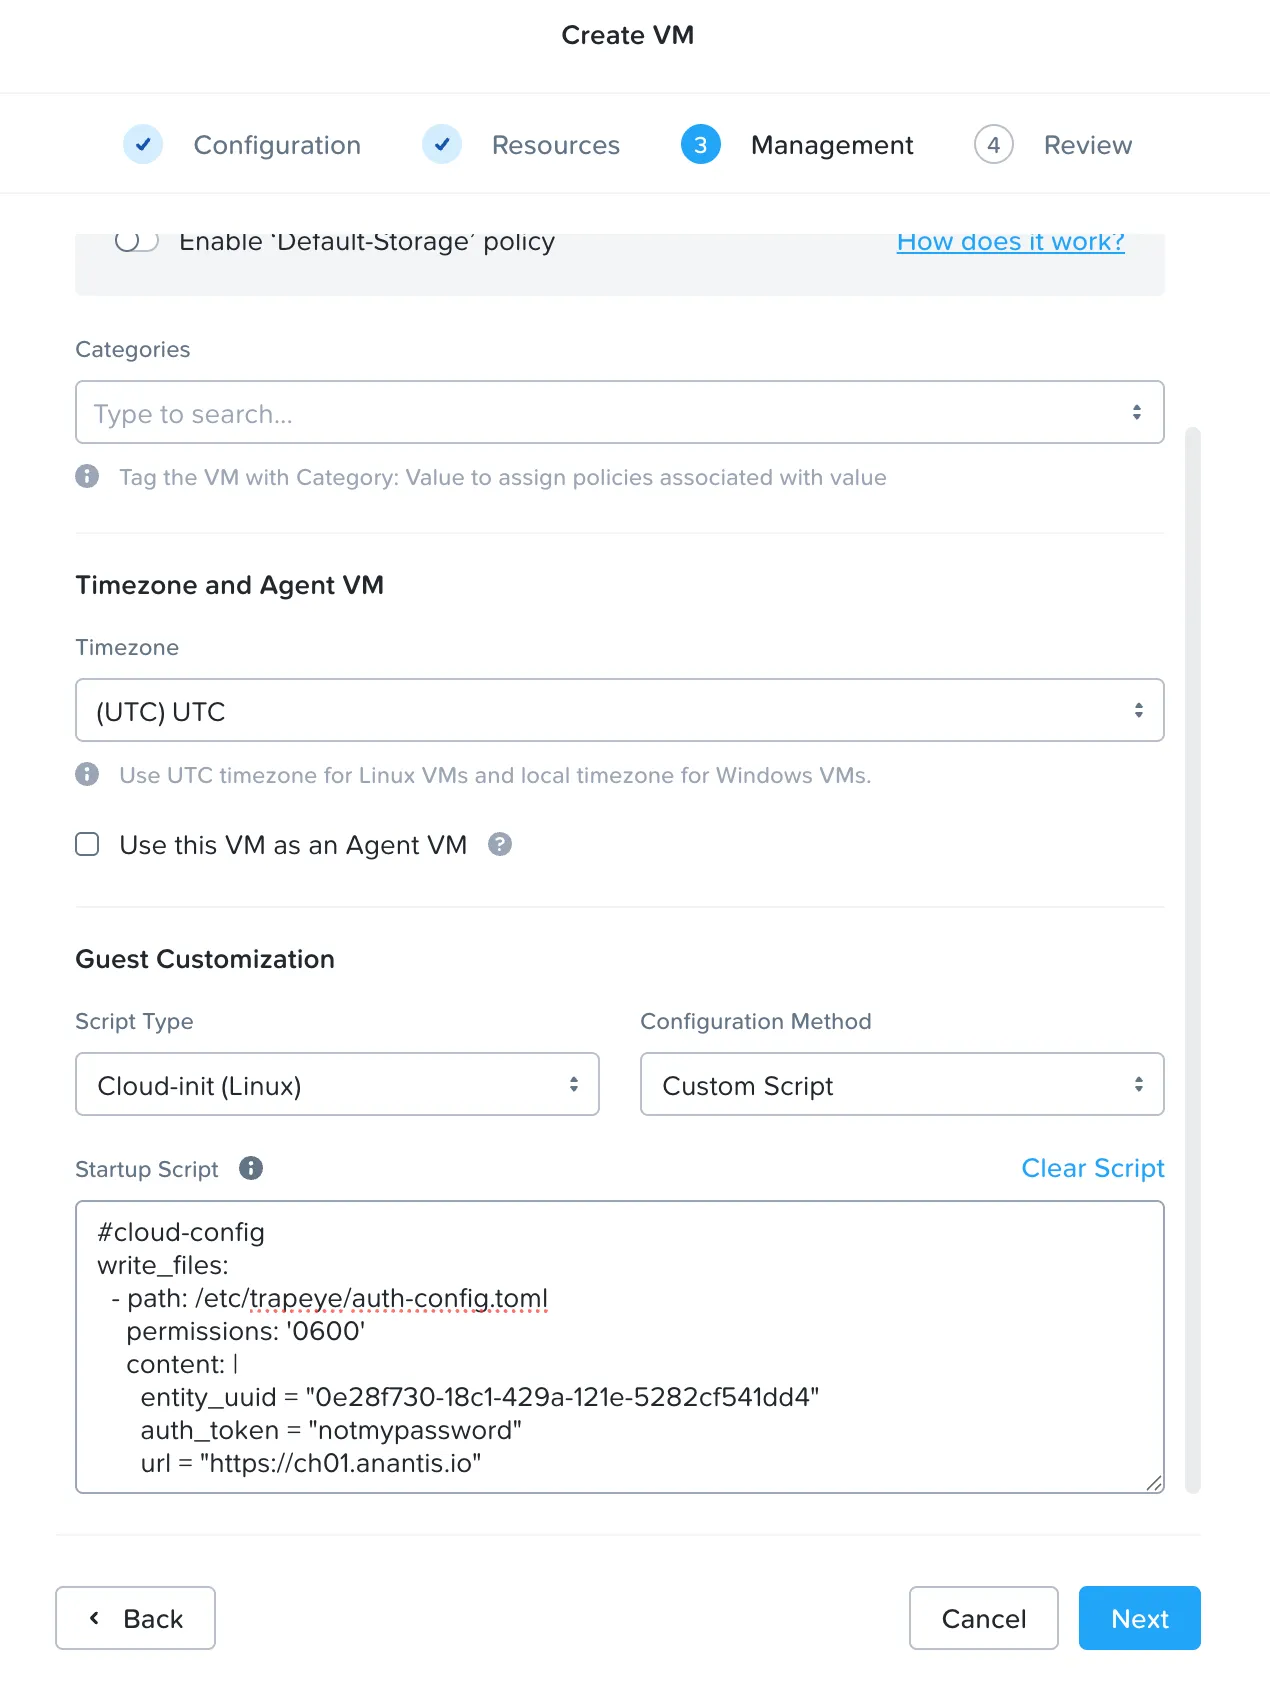
From the TrapEye Platform, go to Management → Installation and copy the values for
entity_uuid,auth_tokenandurlfor Nutanix.Replace the placeholder values in the template below with your TrapEye configuration parameters.
#cloud-configwrite_files:- path: /etc/trapeye/auth-config.tomlpermissions: '0600'content: |entity_uuid = "ENTITY-UUID-HERE"auth_token = "ENTITY-TOKEN-HERE"url = "INGESTION-URL-HERE"In the Management section, under Guest Customization, set the script type to Cloud-init with a Custom Script and paste the cloud-init script from the Anantis TrapEye Nutanix Installation Card.
Click Save to create the virtual machine, then power it on.
Setup complete
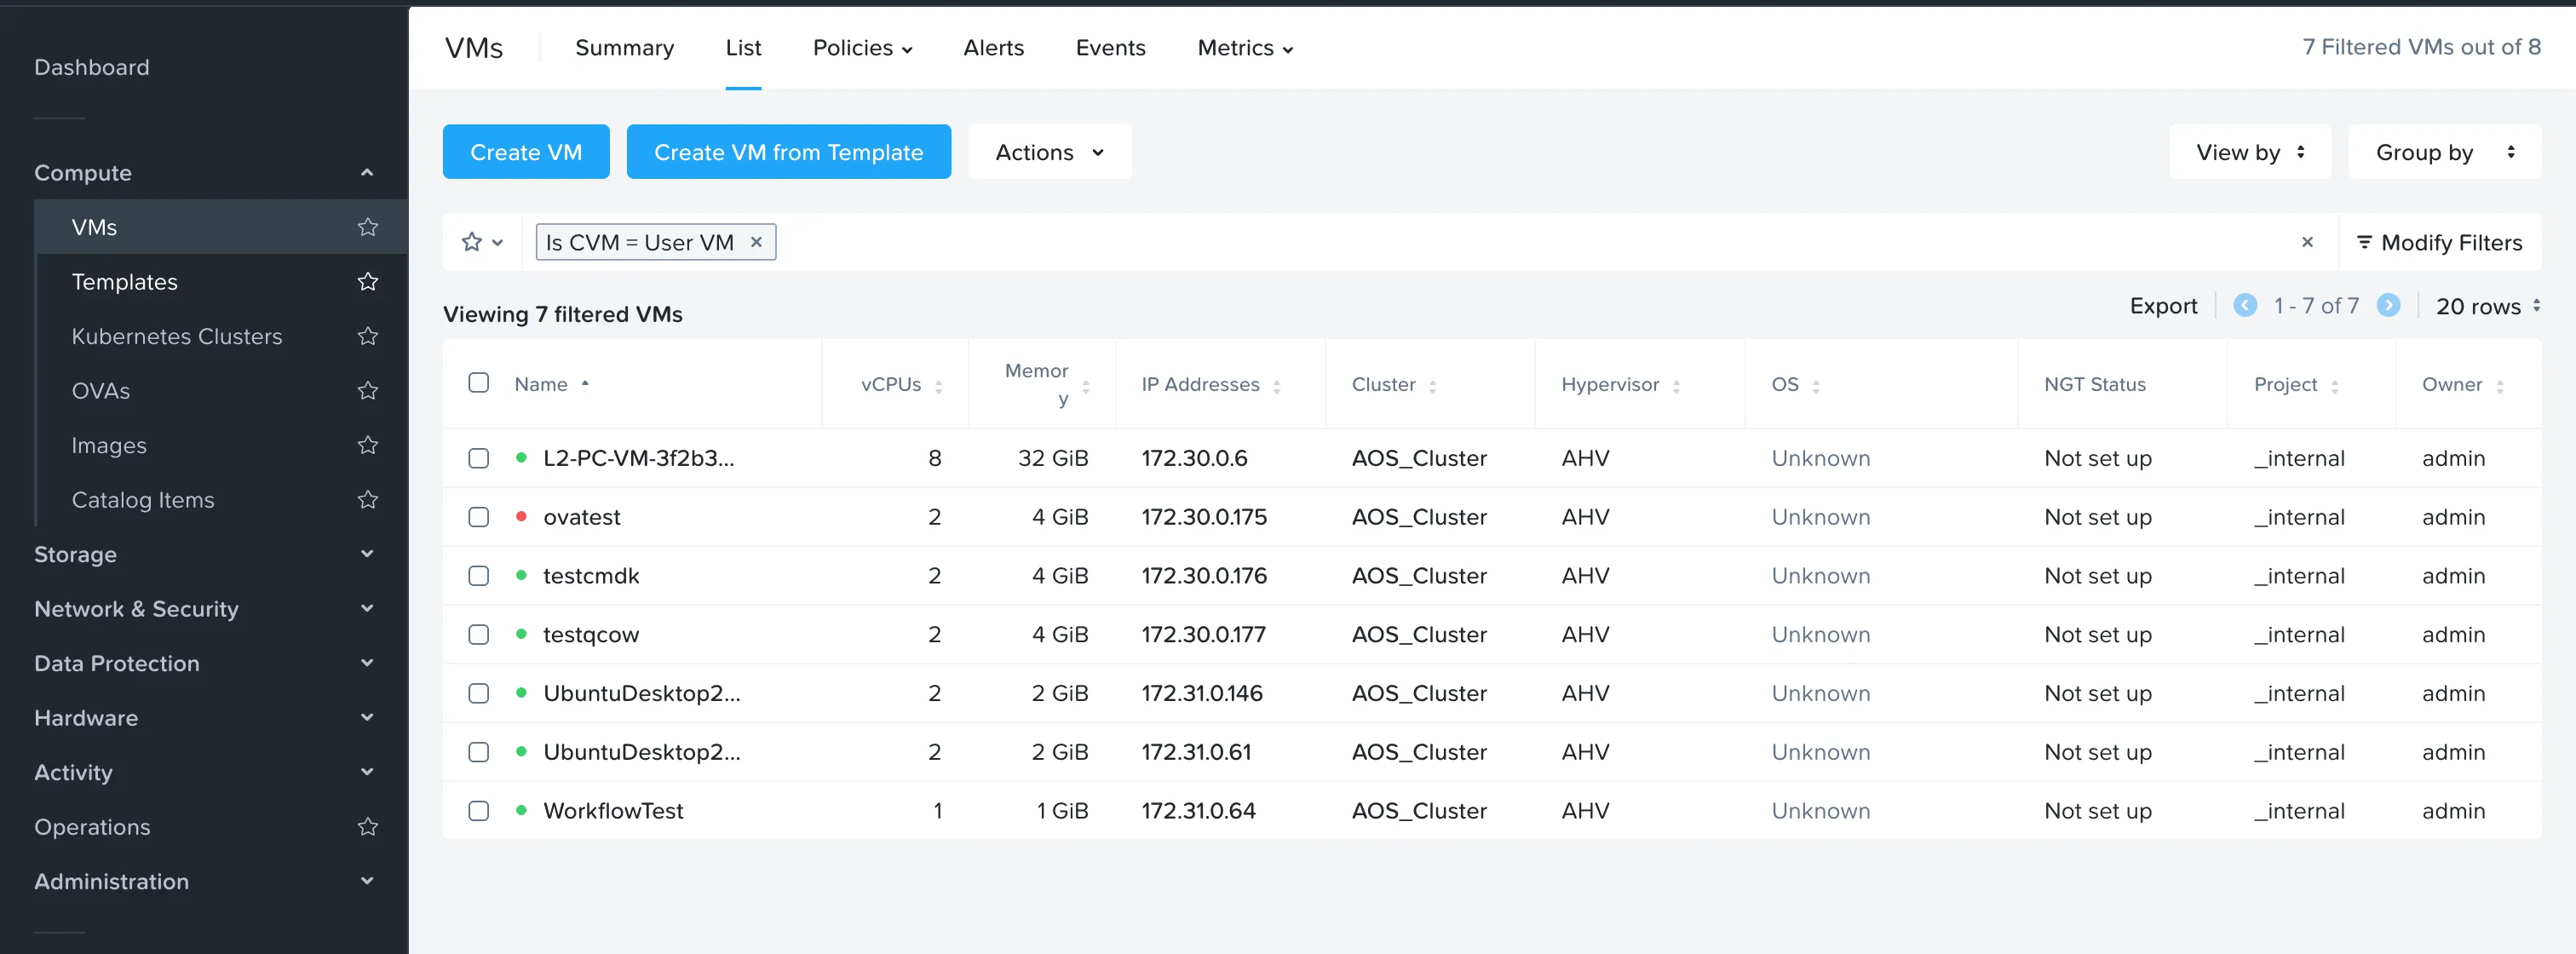
Section titled “Setup complete”Your TrapEye virtual machine has been successfully deployed on Nutanix.
It will now appear in the Devices section of the TrapEye Deception Platform, and you will begin receiving real-time alerts as soon as any activity is detected.